
Intro
Hello there, and welcome to my guide on how to develop a game using Unity. For this series of posts, I will be exploring how to make games using Unity version 6. This blog post and series will guide you through what you need to know to use Unity 6 and make a game.
So, who is this tutorial series for?
Well, it’s going to be for newcomers who want to develop a game, especially those people who are new to the game development world. This is the right place if you are someone who has just picked up Unity 6 and you are looking to get started with it and see if it’s the right engine for you.
My plan is to take you from a beginner level to an intermediate level. I am not going to dump a whole lot of concepts, and speed through topics with lightning speed. Instead, I will take my time and explore game development on a deep level.
As mentioned before, we’ll be using version Unity 6.0 or greater, this series should work in any version of Unity moving forward. Therefore, it should work in Unity 6, 6.3, the upcoming Unity 7, and so on. Please note, some of the things we’ll be working on will only work in modern versions of Unity so you may have issues if you are working with a version of Unity prior to version 6.
So, this first post will explore how to get Unity on your PC. We’ll explore the Unity Hub. We’ll get acquainted with the engine interface, and we’ll start inserting game objects into the game. If you’ve ever installed software the process should seem fairly common and comfortable.
Install the Unity Hub
So, first and foremost, how do we get Unity as an engine?
Picking a version
Download the Unity Hub
Your first step will be to go to https://unity.com or https://unity.com/download. The option or link to download Unity will change from time to time, so look for the option to download Unity. This is usually prominently displayed on the front page. From there you will be given a choice to download the Unity Hub. The Unity Hub is a program that allows you to easily install and set up the Unity Editor and start Unity projects.
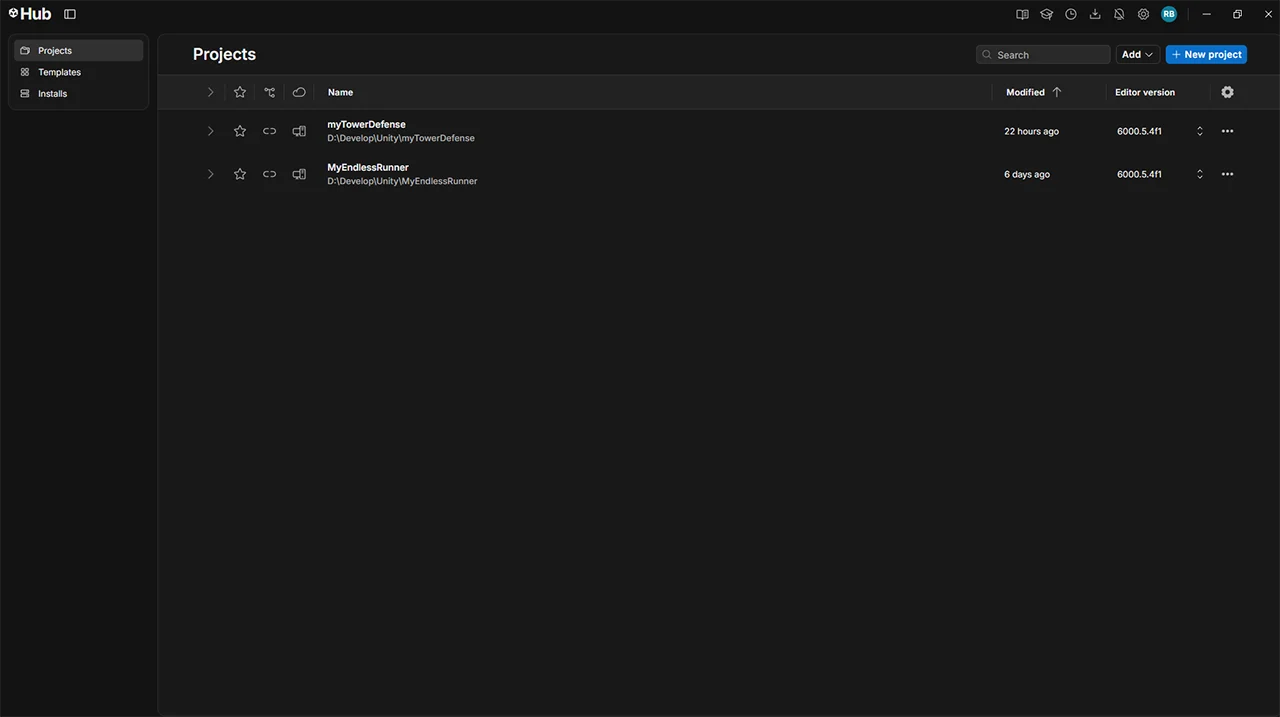
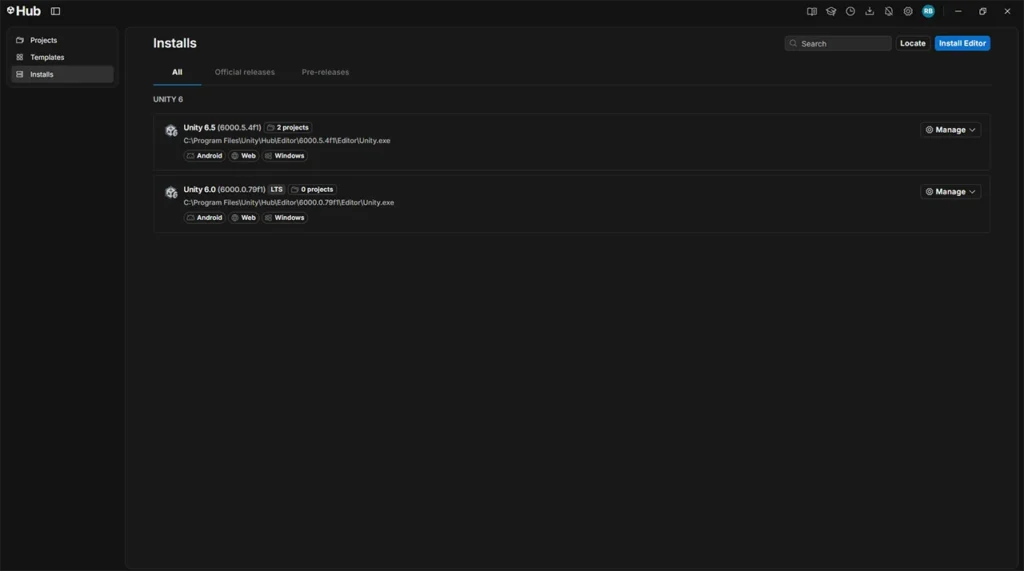
The two things that are most important to you in the Unity Hub are the project tab and the installs tab. The installs tab is where we can install a version of Unity to use. The Hub will also allow you to have multiple versions of Unity installed on your machine. You can have as many versions installed on your machine as you have space for. For this tutorial, I’ll be using Unity 6, specifically Unity 6.5 in this series, but you can use any version that you want to that is Unity 6 or above.
There is a new tab called the templates tab. For this series we will not be dealing with that so it’s safe to ignore. Also, there is a new way to work with Unity called Unity CLI which stands for the command line interface. We will not be dealing with that either.
Version Choice
Once you have the Unity Hub installed you are ready to install the Unity Editor, the place where you will be working on your game. To install the actual interface for Unity, click on install editor. There are two types of installs that you will see:
- Supported Version(s) – Supported Version(s) are versions of Unity that will continue to receive support until the next Long Time Support version comes out.
- LTS or Long-Term Support version(s). – Long Term Support versions will be available and supported for at least the next 2-3 years from its last release.
Generally you should pick the Long-Term Support version or LTS for games that you plan to release. As a beginner you should avoid working with any “Alpha” or “Beta” versions. Use these versions if you are an experienced developer and are willing to test the latest features planned by Unity as these versions may contain bugs and/or crash frequently.
Adding Platforms
Once you choose a version to install, you will see a list of platforms that you can build for. Now, this isn’t an exhaustive list. But for now, you can click on the platforms you want to build your game for. So, whether it’s Android or whether it is iOS or whether you just want to build for Windows, make sure you select at least these options here. If you want to build for Linux or Mac, you can do that. That said, you should pick the same OS as your device. Unity automatically selects building to your own device type/OS usually selected as the default.
So, if you’re on a PC with Windows you should install the option to build for PC and so on. You can absolutely build for a Mac on a Windows device, but to test your application build you will need to have the device you want to test on available. In addition, Apple and Google may have developer requirements if you want to publish or test on Apple or Android based devices.
Editor Choice
Normally you will have to install the Microsoft Visual Studio development environment if you are on Windows. If you are on Linux or Mac, you will have to install a substitute code editing environment.
Note: If you already have Visual Studio installed, you do not need to install it again
That said, for Windows and Microsoft Visual Studio, you may still need to enable development for games during the install for Visual Studio itself if you have never done this.
Note: You are free to use another editor besides Visual Studio as your code editor. You can use VS Code or Rider from Jet Brains if you wish.
If you’re building for mobile you should also own a device that you’re building for. For example, you should own an iPhone to build for IOS and possibly a Mac so you can test thoroughly on that device before releasing your game to the public. Additionally, releasing on IOS will probably require a developer account with Apple and you will need a Mac to sign the application for the App Store. If you’re building for Android, it is good to have a device you can build and test to. There are requirements for publishing to the Google Play Store but generally this does not require any fees as far I know at the time of this post.
Web Builds
For Web builds the development device does not matter as much so feel free to add support for a Web build if you plan to publish on platforms like https://Itch.IO. Once you have made your selections you can click on “Continue”. Installing everything will take a while, but it will install all of the platforms and the engine as well as Visual Studio.
Creating a Project
Picking a template
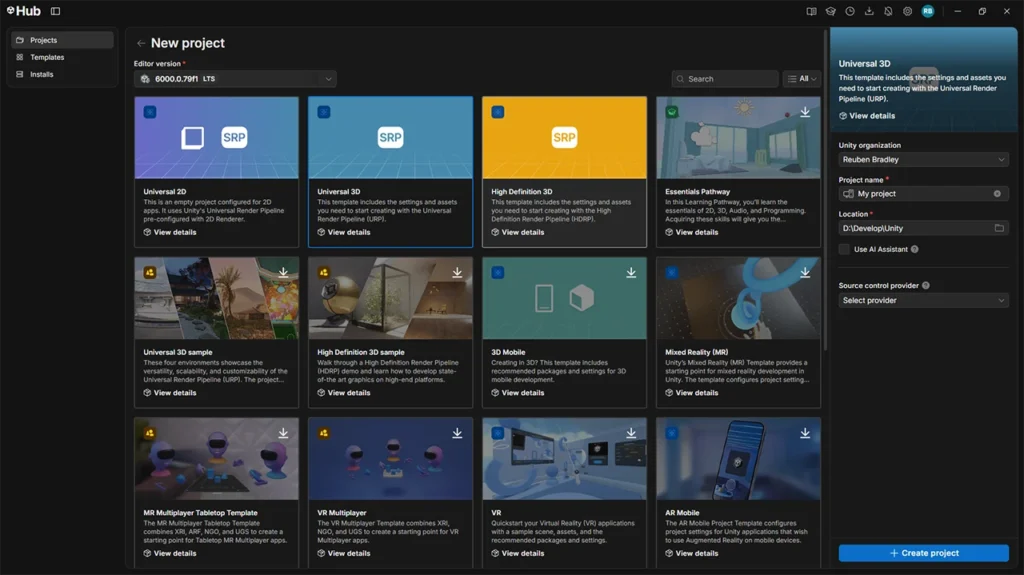
Once that’s done, click on projects and then click on “New project”. Here you’ll be able to select the editor version. So, if you have multiple engines installed, you’ll be able to select from the list here. So, let’s pick version 6.5 or later.
For this series, make sure you select “Universal 3D”. This is often referred to the Universal Render Pipeline or URP. The Universal Render Pipeline is designed to be compatible with a wide variety of platforms and devices.
To keep things simple we will not discuss the other options at this time. This does not prevent you from switching to another setting later on, so you don’t need to feel locked into anything.
Project Settings
Next, if you are connected to the internet, you’ll be able to select your organization here. In other words, your Unity account. You can add your project name here. Don’t worry about picking the final name you will give the game; you can configure that in the build.
File Location
And from there, you choose your location. So, save it wherever you want to. I would recommend creating a master folder where you will store all your Unity projects. The hub will remember the folder you initially select and will use that as the default for your next project. Additionally, this makes it easy to find your projects later.
Unity Cloud
In this dropdown by default, it will create cloud id and controls. This is intended to assist you when you publish your game and provide other optional Unity services like “in app ads” for example. For test and learning projects you do not need this so be sure to select the option to create a local project. You can always connect your project to the cloud later.
Unity AI
In newer versions of the Unity Hub there will be an option to enable Unity AI. You do need this so leave unchecked. This is a paid service from Unity and beyond the scope of this series.
Version Control
There will also be an option to use version control. You could use version control if you want to. There’s no point at this stage. That said, if you are familiar with version control you can use Git and Github or Gitlab respectively. You can also use Unity Version Control, which is a paid service.
For our use you don’t need any of that. After that, once you’ve selected those, click on create project. Personally, I use Git, but I never check any of the options here. Later versions of the hub will automatically detect your use of Github. There is no need to touch any settings in the Unity hub though.
Starting the Project
Again, it will take a couple of minutes to put it together, the first time your project loads it may take a significant amount of time. Even when the editor loads there may be a slight pause while the editor completes its initial setup. Once everything loads you will see the default Unity layout. The layout is very flexible and can be configured to meet your preferences.
Starting with the Layout
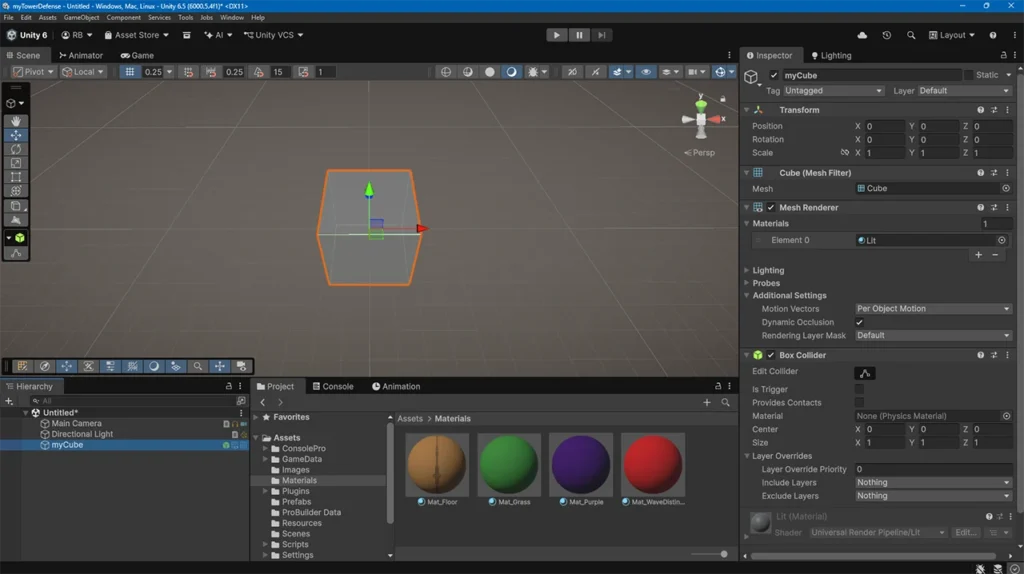
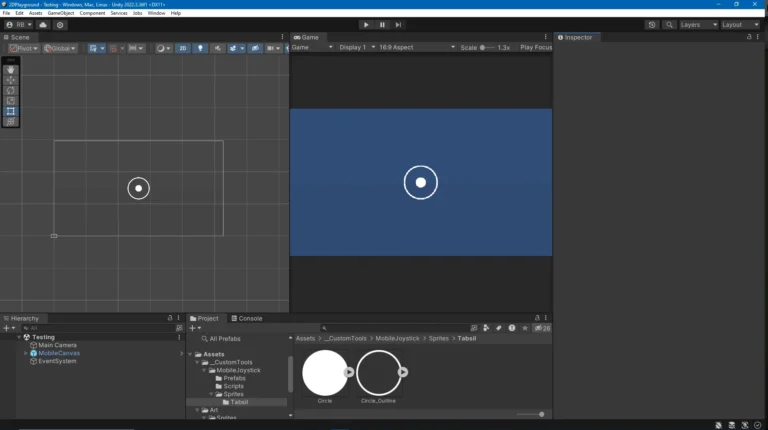
Let’s start with the hierarchy. The hierarchy is a panel that lists every single Game Object currently active in your scene. By default, Unity starts you off with three basic items:
- Main Camera: What the player actually sees.
- Directional Light: The “sun” of your world.
- Global Volume: Controls your overall graphics and post-processing.
Game Objects
Let’s take a moment to briefly discuss game objects. In Unity a Game Object is the basic building block for everything in your scene. You then take some piece of functionality like a camera, a model, a sprite and/or a script and attach it to a game object to create the objects and the functionality you need for your game world.
There is no restriction to what components you can have on game objects, but there is no point having a camera component on a cube if the cube is just a ground. You can have any number of scripts attached to a game object. So, you can easily have a script for movement and a separate script for collisions for example. In fact, many Unity developers work this way.
Click on objects in the hierarchy, and you will see that they get selected and that item will appear in the Inspector window which will display all the properties for that game object. The Inspector window also allows you to change some of the properties of the components that belong to that game object. By default, every game object in the scene view has a transform component. This component tells Unity where it is, the position, which way it’s facing, the rotation, and also how big it is, which is the scale.
Scene View
The Scene View is the window where you will be spending the most of your time. What is the scene view? This is the visual representation of where your game objects are. So, for example, we click on main camera. This is where our camera currently is. So, if we double click on the hierarchy, it will focus on whatever object we’ve just clicked on. You can also single click on an object in the hierarchy and then press to F key to find that object in the scene view.
Now, we can use our mouse in the scene view to zoom in and zoom out. If we hold the right mouse button, we can pivot around on the spot. Also if we hold the middle mouse wheel, we can pan around. Obviously, the left mouse button will be able to click and select objects.
Game View
The next tab along is the game view. This is a way of playing whatever we’ve built in Unity in engine. We don’t need to build the game to play test it. We can literally play it in the engine. Much of your time will be spent testing your game and viewing the results in the game window.
Animator Window
The animator window controls animations for a game object that has an animator attached. This window may or may not be open automatically when you start your first project, but it is easily accessible by going to Window->Animation->Animator. It works in tandem with an Animation window where you can manage the animation clips you have for that game object.
Project Window
Normally at the bottom, we have the project window. And the project window is where you can effectively store all your assets. And what can assets be? Anything. They can literally be anything in your game. They can be a texture. or a material, a script, a model. Almost anything! Anything that you use to build your game is an asset, and you store them in folders down here. Make sure you keep everything neat and tidy.
Always use the Unity Editor to bring assets into your projects. You can easily drag and drop files from your filesystem into the project window and Unity will import them.
Be sure to only store your game files in the Asset folder (or one of its subdirectories) and do not store anything in the other folders the engine creates. For example, do not store anything in the Library folder that Unity creates for your project. Generally, you should avoid editing or manipulating any files or folders in your Unity project outside of the Unity Editor or your linked code editor.
Console Window
The next window is the console. And the console is a way of debugging and telling you errors that have occurred in your game. For example, we’ve written some code. There is an error in that code, but we can’t figure out what it is. The console will give you an indication of where the error is and what the error is as well, which helps you establish what you can do.
Build Options
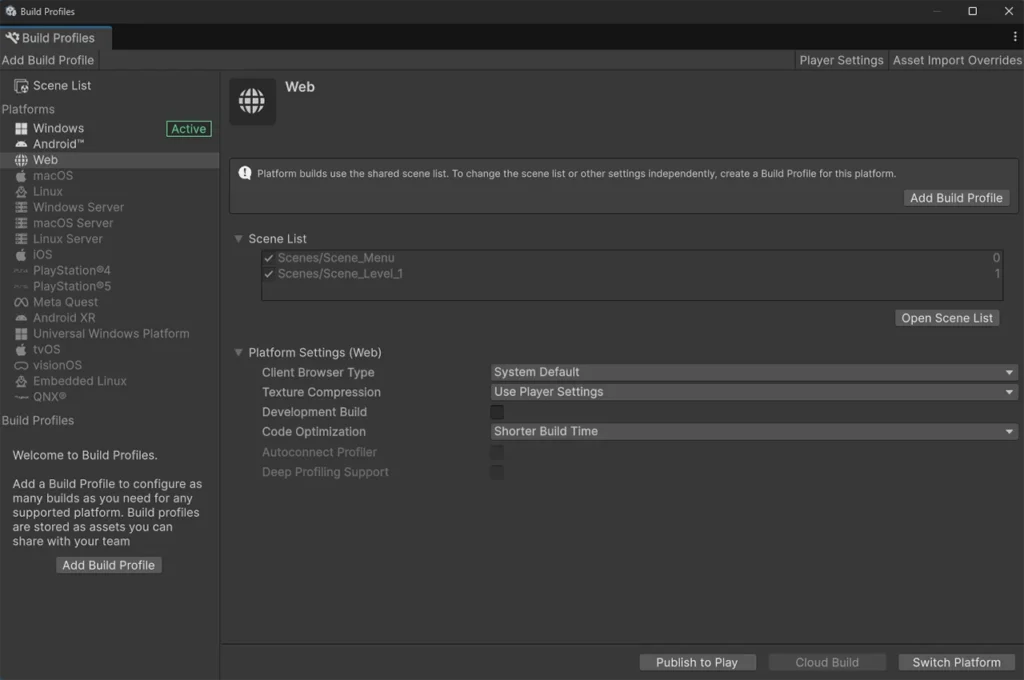
Let’s talk about building the final product. If we go to File menu and go to “Build Profiles”, we can see that currently we are building for Windows. For simplicity, our tutorials will focus on building for Windows. So, anything you build for a specific platform can be built and ported to any other supported platform in Unity. So, if you do want to build this and start with Android, you could effectively port this to PS5 if you have the license. And this is where the other platforms, they didn’t appear when we had the option to install Unity. You need licenses to build for PS5 or PS4, which can be quite expensive. In addition, Microsoft and Sony are very selective when issuing licenses. So, if you want to switch your platform to Android now, you can effectively select Android and then click on switch platform.
Layout Options
Let’s explore the Unity Layout in a little more detail. You will notice that the tabs that we have here can be moved around. So, if we want this game view to be on the left side, or the middle or even the right side, we can drag it there. We can undock it and place it in the middle of the screen or another monitor.
We can expand it, make it almost full screen, and we can close it down. And it’s the same with any tab. We could effectively move the console window up to the top if we wanted to or make it its own object. For my games, I like to keep the console tab at the bottom and give it enough width so I can easily read the messages.
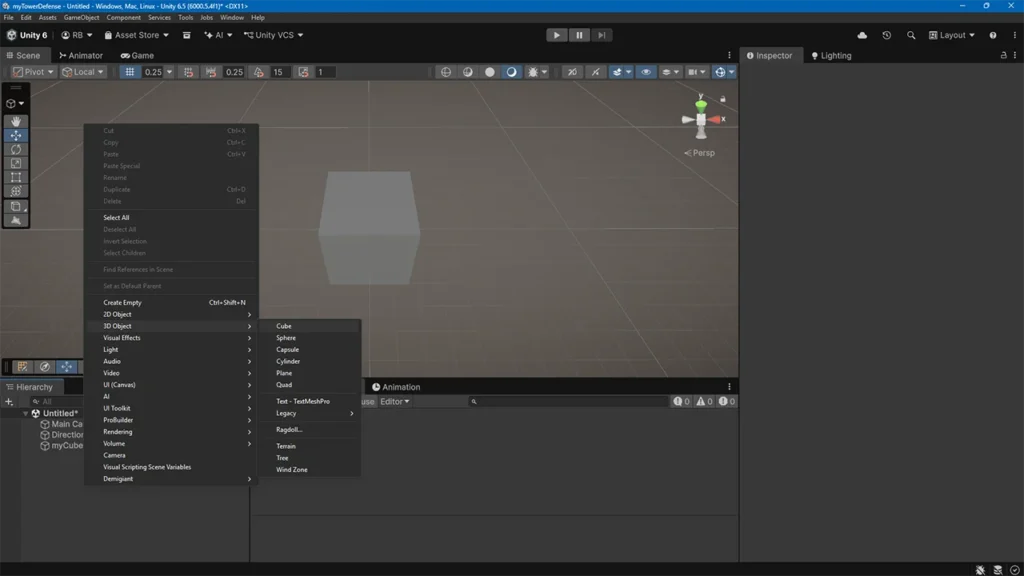
Let’s explore the hierarchy a bit and see what our options are. As we mentioned earlier, the hierarchy is where we can list the game objects that are in our scene. For example, we can right click anywhere in the hierarchy where we see an open space and get a list of objects that we can create.
Working with Game Objects
Object Creation
To start, let’s go to “3D object” and make a cube. As soon as you add it in, you’ll get the cube placed into the hierarchy, and it will give you the option to name that cube. You can give the cube any name you want. Don’t worry about the name being unique or clashing with the names of other game objects in the scene. The name you give it is completely cosmetic.
You can also create a sphere, or other 3D objects (often called primitives) into the scene. Another thing you will notice is that you can create a “child” game object that is attached to your original cube. These child objects will stay attached and move relative to their parent game object. You can create as many child game objects as you need.
Object Placement
When you create a game object it will be placed in a random place in the game world or scene. In a later post we will adjust the Unity Preferences so that a newly created game object is always placed exactly in the middle of the game world or at (0,0,0). We’ll discuss what this means in another post.
For now, we’ll make sure our cube stays selected and we will go to the Inspector and ensure the Transform component is set to be at position (0,0,0). And you can see already our game is taking shape. Yes, it’s just a cube, but it is taking shape. Now you can build your game, publish it to Steam and make millions of dollars overnight. Of course, I am just kidding but wouldn’t that be nice!
You can and should play around with the Unity interface. Make cubes and other objects. Delete them. Select the camera, your game objects and check out the components in the Inspector. A lot of the components and options will seem confusing at first, but you’ll get used to them. Be sure to play around with panning the camera, zooming in and out. If you’ve ever played a First-Person shooter many of the scene view controls are similar. There’s nothing you can break permanently so feel free to experiment!
Intro to Coding
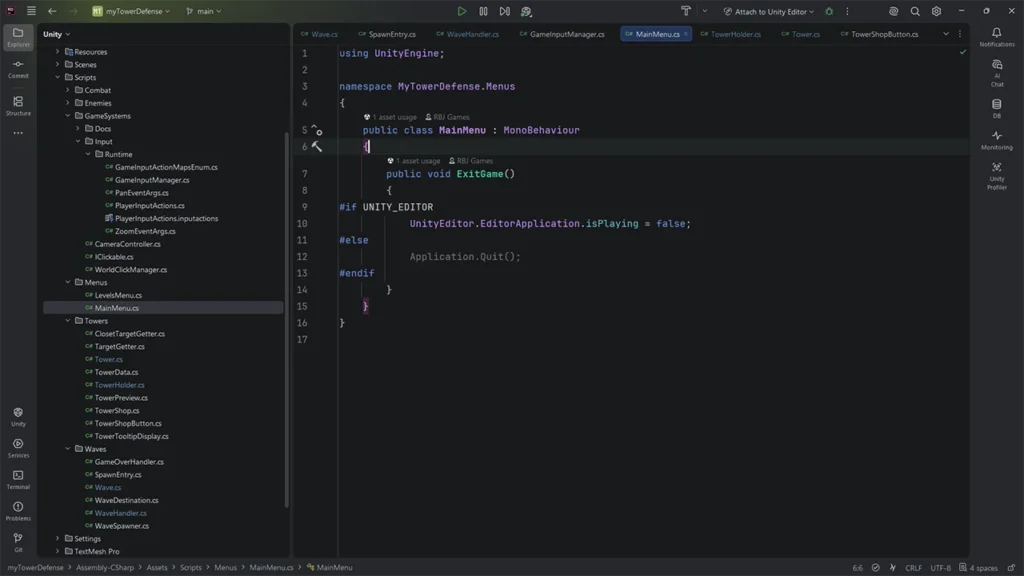
Coding is easy!
Don’t be afraid, in next post what we’re going to do is we’re going to start coding straight away! And honestly, it’s a lot easier than what you think. What we’ll be doing is we’ll be taking an imaginary player character, and we’ll write a code that will allow it to start moving or start running so we can see some actual gameplay inside the game.
In Unity there is no built-in gameplay that action that happens by default. We will need to build our gameplay and logic ourselves. We will need to create scripts and attach them to our game objects to get any actual gameplay.
Because if we were to press play now, we’d see absolutely nothing happen because nothing can move in the game. Don’t feel intimidated by coding, it is a lot simpler than you think. Sure, coding can easily get very complicated, but we’ll take things step by step. Unity provides a lot of functionality for coding that can be accessed and make your development life simpler. For example, if you want to rotate your game object in your game world Unity provides helpers for that.
Sure, there may be some advanced concepts to grasp, but Unity takes a lot of the complicated things like the complicated 3D or 2D math and gives you a “simpler” way to make use of it to achieve the things you want to do. Additionally, there is a large community of developers that have probably solved every problem you will run into in your beginner game development journey. While a game can literally contain many lines of code, once you get used to the process, it’s a lot simpler than you think.
Conclusion
That’s the end of our little journey into setting up Unity. We have downloaded Unity, explored the Unity Hub and the Unity Editor a little. We can create a project and save it to a location on our computer. We’re now ready for the next steps into the world of Unity and game development. See you there!